Fab's AutoBackup forums
Bienvenue sur les forums de support technique de Fab's AutoBackup
You are not logged in.
- Topics: Active | Unanswered
Announcement
Due to a large amount of fake accounts registrations for advertising purpose (spam), this forum does not accept new registrations any longer.
You can still browse existing threads to find the help you are looking for. If you do not find it and have questions, please use this contact form.
====================================
En raison d'un nombre important d'enregistrements de faux comptes utilisateurs à des fins de spam (publicité non sollicitée), il n'est désormais plus possible de s'enregistrer sur les forums de support technique.
Vous pouvez toujours parcourir les sujets existants pour trouver ce que vous recherchez. Si vous ne trouvez pas l'information et avez des questions, veuillez utiliser ce formulaire de contact.
#1 2018-03-16 10:55:56
- Fab
- Administrator
- Registered: 2011-05-11
- Posts: 1,311
[DEPRECATED] Make a Win10/11 PE disk including Fab's AutoBackup 7 Pro
Win10XPE is a Windows 10/11 based rescue environment. This is a procedure showing how to make your own PE environment including Fab's AutoBackup 7 Pro, so you can use it to recover data from unbootable Windows installations.
This tutorial has been made under Windows 10 Pro x64. It should work with Vista, 7, 8.X and others 10/11 builds too.
Fab's AutoBackup 7 Pro screen shot running under Windows 10 based Win10XPE :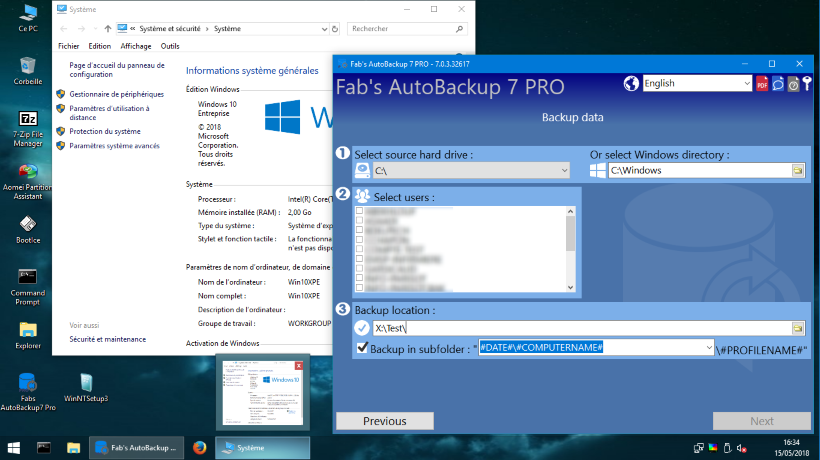
What you need :
- A computer running Windows Vista/7/8.X/10/11 32 or 64 bit.
- A genuine Windows 10/11 32 or 64 bit media. If you need to boot your PE on a PC with enabled secure boot feature, a Windows 10/11 64 bits is highly recommended. Warning: ISO files made from Microsoft Media creation Tool are not compatible. To get a suitable ISO file, you can go straight to Microsoft's website https://www.microsoft.com/en-us/softwar … /windows11. Follow the instructions under the "Download Windows 11 Disk Image (ISO)" section.
- At least 8 GB free on your hard drive.
- Fab's AutoBackup 7 Pro (You have to buy and download it in a first place)
In this tutorial, the used Drive will be E and 64bit Windows 11 as source.
Step 1 :
WARNING: before you go further, disable any running anti malware (including Windows Defender) as there is a false positive on a tool in the archive. There's no virus in it (I promise!).
Download Win10XPE from this page :
https://download.fpnet.fr/winpe/en/Win10XPE.exe
Step 2:
Extract the files to E:\ drive. You should have a folder named E:\Win10XPE.
The password to extract archive is fabspe
Once extracted, I suggest that you whitelist (exclude from analysis) the "E:\Win10XPE\Projects\Tools" folder or the "E:\Win10XPE\Projects\Tools\GWT.exe" file in your antivirus settings. This way, you will not have to disable it every time you will follow this tutorial.
Step 3 :
Create a "E:\SourceWinx64" folder and copy the Windows 10/11 DVD/ISO content inside
Step 4 :
Run "E:\Win10XPE\Win10XPE.exe"
Step 5 :
Select the "Win10XPE" root on the left tree view, then, select the "E:\SourceWinx64" folder :
WARNING: Be sure to select "E:\SourceWinx64" folder and not "E:\SourceWinx64\sources" or you will get an error message and you won't be able to go further!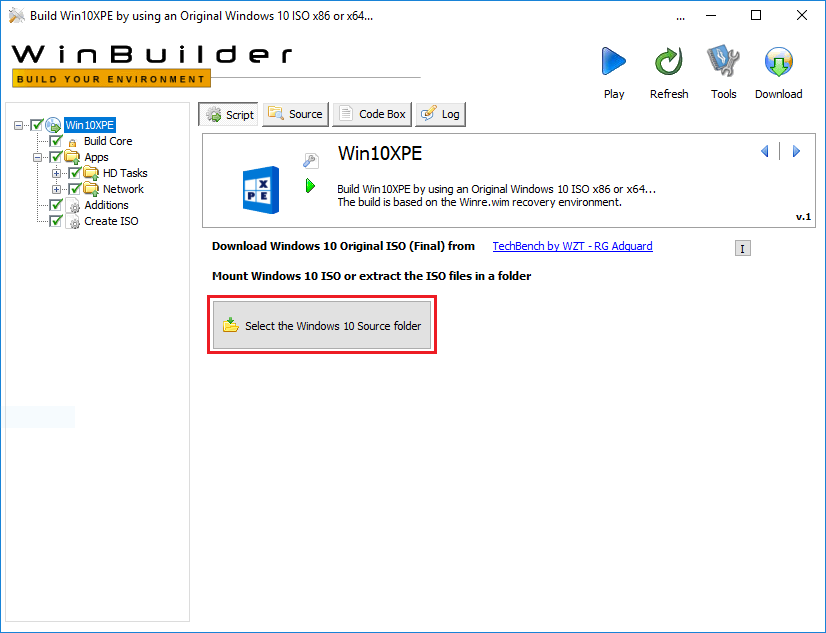
Step 6 :
Select the "Build Core" script and make sure that the WoW64 Basic box is checked. This is required for Fab's AutoBackup 7 Pro to run in 64 bit PE:
Step 7 :
Using the tree view on the left, select "Fab's AutoBackup 7 Pro (Official plugin in English)" under "Win10XPE\Apps\System Tools" and check its box.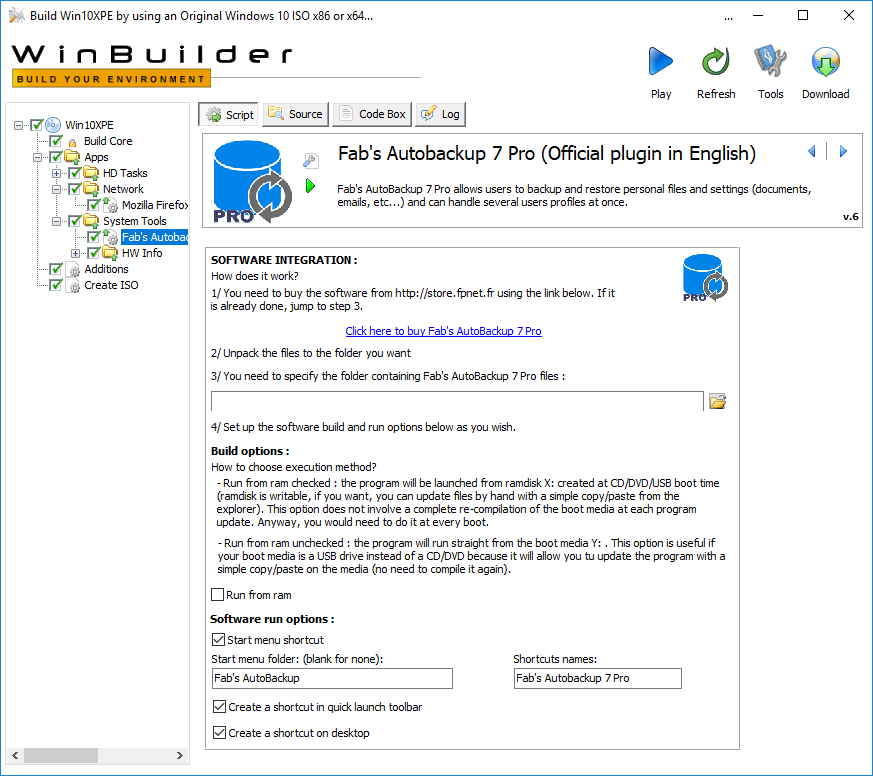
Step 8 :
Specify the Fab's AutoBackup 7 Pro folder using this button :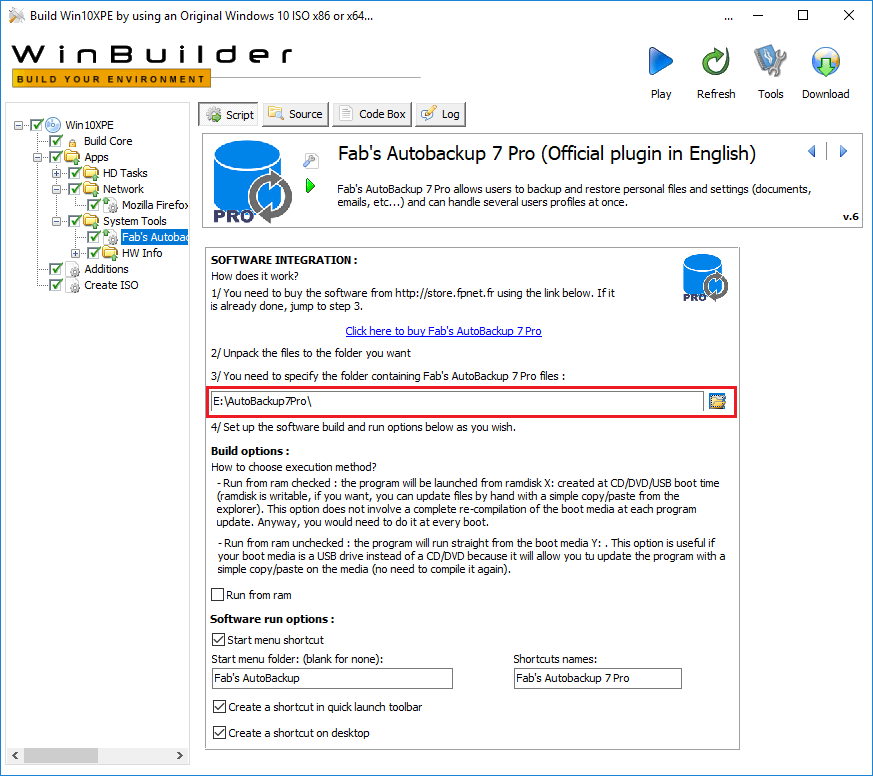
Optional but recommended: Fab's AutoBackup 7 Pro should have been started at least once and activated using your order ID and email address used at purchase (you can find them on your order process receipt you got by email). Accept also the EULA (End user License Agreement). This will be saved in a configuration file that will be include to you PE build and avoid it from asking such information at each start.
Step 9 :
Specify your options : shortcuts options, running from ram or not. Leaving the "Run from ram" box unchecked is useful if you are building a USB boot media. This way, Fab's AutoBackup 7 Pro files are not packed in the PE, so, you can update your program without recompiling.
Step 10 :
Build the Win10XPE ISO using the big Play button on the right corner :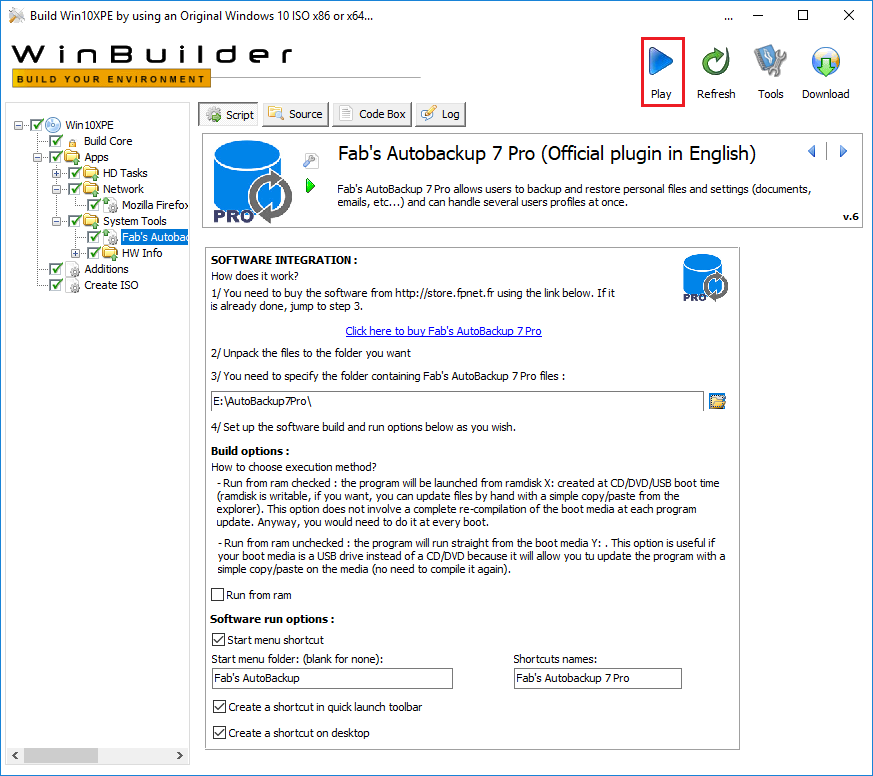
You may be prompted for files download, let the builder download the files it needs or the build process will fail.
Step 11 :
If you are not building a USB bootable drive, burn the "Win10XPE_x64.ISO" or (Win10XPE_x86.ISO if you used a 32bit Windows 10 media) file inside the "E:\WIN10XPE" folder to a blank medium with you favorite CD/DVD burning software.
Step 12 : if you want to create a bootable USB drive instead of burning a CD/DVD:
- Plug a USB drive in your computer (a fast one if possible). Warning: this drive will be formated, so, please backup its content before going further!
- Select the "Create ISO" script and click the "Copy ISO to USB" button.
- If this boot media will be used to store backups, it is highly recommended to use NTFS file system instead of Fat32 because it can handle files larger than 4 GB. If you are using a hard drive/SSD, NTFS is the best option anyway.
- Select the USB drive to use in the drop down menu and click the "Copy To USB" button:
- Confirm and let it prepare your USB drive.
- Close the utility at the end of the process.
That is it. You now have a Windows 10/11 rescue boot CD or USB drive including Fab's AutoBackup 7 Pro.
Fab
Offline
- Registered users online in this topic: 0, guests: 1
- [Bot] ClaudeBot
[ Generated in 0.016 seconds, 7 queries executed - Memory usage: 1.55 MiB (Peak: 1.66 MiB) ]